Using the Scheduler

Margarita Berezyanskaya
Last Update рік тому
Setting Up Your Scheduler
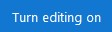
1. Click on the Turn Editing on button.
2. Click on the link Add an activity or resource.
3. In the pop-up that appears, choose the Scheduler icon.

Note: The Adding a new Scheduler screen appears.
4. In the General section, type a Name for your course scheduler.
5. In the General section, type an Introduction to your course scheduler.
Note: This will guide the learners to using it more effectively.

6. In the options section, type the Role name of the teacher.
Note: This is the position of the person meeting the learners. (e.g., counselor).

7. In the Mode option, choose the limit of learner appointments in the Students can register drop-down.

9. Select either No or Yes, for all groups in the Booking for Groups drop-down.

12. Set the appointment length by typing a number into the Default slot duration.

13. Choose Yes or No of appointment confirmations or cancellations in the for Notifications drop-down.

Note: Notes can be added to a schedule request based on the choice made by the person requesting the meeting. This is a sample note from a teacher to a student.

15. In the Grades section, if desired, choose to apply a grade for the appointment and the type of grade in the Grade option drop-down.
Note: Since the scheduler is an administrative tool, assigning grades is uncommon.
Note: In the Booking form and student-supplied data section, an additional set of criteria for the meeting can be presented to the learners before they submit their appointment request.
17. If No is chosen for Use booking form, then click on the Save and Display button.
18. If Yes is chosen for Use booking form, the section becomes active.
19. In the Booking instructions text field, type instructions for the learners.

Note: Usually, this is a prompt to the learner to provide some information about the reason for the appointment booking.
20. Choose No, Yes, optional for student or Yes, student must enter a message in the Let students enter a message drop-down.
21. Choose the limit on number of files that learner can upload with the meeting request in the Maximum number of uploaded files drop-down.

Note: Settings in the Common module section are common to many Moodle activities and resources.

22. The Availability setting is used to Show/Hide the activity. This is identical to using the Show/Hide icons when the Turn editing on function is enabled on a course home page.
23. The ID Number setting sets an ID number for advanced use of the grade book. (This is not used in the LINC courseware.)
24. The Group mode setting enables the use of groups. (More information is available in the Organizing Learners Using Groups article.)
25. The Grouping option enables the use of groupings (a collection of groups).
Note: Settings in the Restrict access section can be used to limit access to the activity. (More information is available in the Setting up and Using the Restrict Access Settings article.)

26. Click on the Add restriction... button to display the Add restriction... pop up.

27. The Tags section can be used to add keywords to the assignment.

28. Click on the Save and display button to save/update the activity or click the Save and return to course button.

Note: If the Save and display button is chosen, the Scheduler screen appears.

29. Click on the Add slots link.
30. From the drop-down, choose either Add repeated slots or Add single slot.

31. Choose the option Add repeated slots to set up an appointment schedule.
Note: The Add repeated slots screen appears.
32. Choose a start Date.
33. Check the Enable checkbox in the setting Repeat time slots until.
34. Choose an end date in the setting Repeat time slots until.
35. Check the days of the week for appointment beside Add appointments on.
36. Set a Time range for the appointments.

37. Choose Yes in the Divide into slots drop-down.
Note: This automatically parses the appointments based on your criteria.

38. Input a number of minutes per slot in the Duration textbox.
Note: This was already set but can be revised at this point.
39. If a break is necessary, type a number of minutes in the Break between slots textbox.
40. Choose No in the Force when overlap.
Note: This ensures that the existing appointments will not be removed.
41. The Maximum number of students per slot can be enabled to set a specific limit of students per slot. If it is disabled there is no limit to the number of students who can attend the appointment.
42. Type a location in the Location textbox.
Note: This can be a virtual address.

43. Choose the instructor in the Instructor drop-down.

44. Set a time using the Display slot to students from drop-down.
45. Set a time using the Email a reminder drop-down from Never to Six weeks before slot.
46. Click on the Save Changes button.
Note: The appointment page appears with the slots and break times in order.

Note: After a learner requests an appointment, they appear in the slot they have requested.

Note: As an instructor you can manage the appointment request using these icons.

In addition, if the send Notifications option was selected, you will receive an email from the Scheduler.

Resources